7 Tips for Choosing Sound Insulation Panels?
Choosing sound insulation panels is not simply a matter of selecting the thickest product. A panel may look dense and impressive, yet perform poorly around doors, ceiling gaps, or unsealed joints. The room’s frequency range, construction type, installation method, and intended use all influence the result. Small details matter. A visible gap can undermine an expensive upgrade.
The World Health Organization’s Environmental Noise Guidelines for the European Region links excessive noise with sleep disturbance, annoyance, and cardiovascular risks. Its evidence supports treating noise as a health and comfort issue, not merely an interior-design concern. ASTM C423 helps assess sound absorption, while ASTM E90 evaluates airborne sound transmission through building assemblies. These tests are useful, but ratings should not be treated as perfect predictions for every room. A neat laboratory number can still disappoint onsite.
Audio engineer Ethan Winer is often quoted as saying, “There is no such thing as soundproofing; there is only sound isolation.” That distinction shapes the seven tips ahead. Effective sound insulation panels should match the unwanted noise, not just the wall color. Look closely at NRC or comparable absorption data, thickness, density, fire performance, moisture resistance, and mounting hardware. Check whether the product reduces airborne noise, reverberation, or both. Consider the entire assembly.
Good choices require evidence. They also require honest expectations. No panel fixes every room. A careful evaluation can still reveal compromises, especially in older buildings with thin walls and vibrating floors.
Understanding How Sound Insulation Panels Reduce Noise
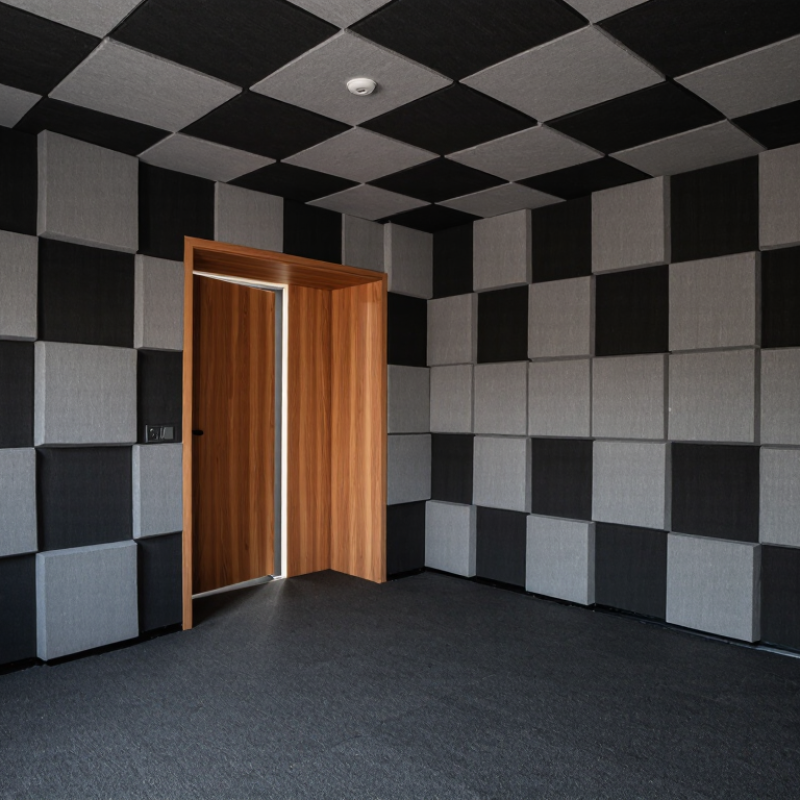
Sound insulation panels are often chosen to make a room quieter, but “quieter” can mean two different things. Porous panels absorb some sound energy as air moves through their fibers or foam, reducing reflections and reverberation inside the room. A sharp hand clap may sound less bright. They usually do not stop voices traveling through a thin wall. That distinction matters.
For sound passing between rooms, performance also depends on wall mass, airtightness, gaps around doors, and the structure itself. A panel fixed over drywall can improve room acoustics, yet do little for bass traveling through studs. It is easy to expect silence from a few decorative squares; that hope is understandable, but often too optimistic. Check absorption test data, while remembering that results depend on panel thickness, mounting, and frequency.
When choosing panels, match them to the problem: echo in a bare office, unclear speech near a desk, or noise leaking through a shared wall. Place absorbers at reflection points, often on side walls or the ceiling, and choose enough coverage for the room. Measure before buying if possible. Even a small untreated corner can change how a room sounds.
Identifying the Noise Source and Insulation Requirements
Choosing sound insulation panels starts with the noise, not the product. Measure when the problem is loudest: footsteps at night, machinery at noon, or traffic before dawn. Listen from several rooms, because sound may travel through ceilings, ducts, doors, or shared walls. Record short samples and note frequency, duration, and direction. Low bass feels like vibration, while speech and alarms often need different treatment. An inexpensive sound meter can reveal patterns that casual listening misses.
Ask an acoustic professional to inspect the room if the source remains uncertain. Experience matters here. Panels that absorb echoes may not block noise entering through a thin wall. Check the wall’s mass, air gaps, framing, and weak points around sockets and pipe openings. Then define the requirement: lower reverberation, reduce airborne noise, or limit structure-borne vibration. These are different targets. Review measured decibel levels, acceptable nighttime levels, panel thickness, coverage, and fire-performance documentation. Do not choose by appearance alone.
Leave space for installation reality. Panels need tight joints, stable fixing, and careful edge treatment. Small gaps can undermine a large, expensive wall. Use heavier layered assemblies for blocking, and porous materials for controlling reflections. Follow the tested installation method, but question any claim without test conditions. I once underestimated a door gap; the room improved, but the hallway remained disturbingly loud. That mistake taught me to test one section before treating the entire room. Recheck after installation with the same listening points and measurement settings. Real buildings are imperfect.
Comparing Panel Materials, Density, and Acoustic Performance
7 Tips for Choosing Sound Insulation Panels
Start with the noise source: voices, machinery, or reverberation. Choose mineral wool or fiberglass when broad absorption matters. PET panels suit lighter, decorative installations, but low weight is not automatically weaker. Foam can absorb mid and high frequencies, yet often performs poorly at bass frequencies.
Density alone misleads. Compare thickness, airflow resistance, and open surface area. A dense panel may block some sound, but absorption depends strongly on structure and installation. ASTM C423 and ISO 354 measure sound absorption in controlled laboratory conditions. Their results commonly report NRC values from zero to one. An NRC near 0.80 can be a useful screening point for speech rooms, not a guarantee. I once overvalued density and ignored the air gap. That was a costly assumption. A 50-millimeter cavity behind a panel can improve lower-frequency absorption.
Check the test report, not only the product sheet. Confirm the tested thickness, mounting method, and frequency range. ASHRAE Handbook—HVAC Applications (2023) places many office environments near NC 30–35, while the WHO Environmental Noise Guidelines for the European Region (2018) recommend indoor bedroom noise below 30 dB(A) at night. Those targets show why panel selection needs room-specific measurements. Consider fire resistance, moisture exposure, edge protection, and cleaning needs. Installation matters. Gaps, hard reflections, and uncovered ceilings can weaken real performance. Some panels look impressive. They still disappoint.
Choosing the Right Panel Size, Thickness, and Installation Method
Measure the wall and ceiling before ordering sound insulation panels. Record doors, windows, vents, and furniture locations. Panel size should suit the room without blocking access or creating awkward gaps. A 600-millimeter panel may cover a broad wall, but smaller panels often fit better around corners. Leave consistent spacing between panels for a balanced appearance and predictable coverage.
Thickness and acoustic performance
Thickness affects performance, but thicker is not automatically better. Thin panels can reduce reflected speech and high-frequency echo. Low-frequency noise usually needs greater thickness, an air gap, or layered construction. Check the product’s tested acoustic rating instead of trusting appearance. I once installed panels that looked substantial but performed poorly against bass. The mistake was clear after testing.
Installation and realistic expectations
Installation must match the surface and the panel weight. Adhesive works on clean, stable walls, while clips or battens allow removal and improve ventilation behind thicker panels. Keep panels away from damp areas unless their materials are rated for moisture. Seal gaps around doors and service openings when practical. Do not confuse acoustic treatment with full soundproofing. Treatment controls reflections inside a room; soundproofing limits transmission between spaces. In my experience, a carefully measured layout often beats expensive materials placed randomly. Still, room shape, noise source, and building structure can change the result, so professional acoustic advice may be worthwhile.
Checking Safety, Durability, Cost, and Maintenance Needs
Choosing sound insulation panels involves more than comparing thickness and price. Check the panel’s fire rating and request test documents from the supplier. Safer materials should produce low volatile organic compounds, especially in bedrooms, studios, and classrooms. Inspect the backing, edges, and mounting hardware for exposed fibers or sharp parts. I once overlooked the fixing system, and installation took twice as long. That mistake changed my checklist.
Durability depends on the room. For a humid basement, choose moisture-resistant panels and sealed edges. In a busy office, a tougher surface may prevent dents from chairs and equipment. Ask how the panel handles heat, sunlight, and repeated cleaning. A long warranty helps, but read its conditions carefully. Cheap panels can become expensive when they sag, shed fibers, or need early replacement. Calculate the full cost, including delivery, labor, fasteners, and possible wall repairs.
Maintenance should fit your daily routine. Select removable covers if dust collects quickly. Washable or vacuum-friendly surfaces are useful in music rooms and shared spaces. Leave access around vents, sockets, and inspection points. Dense panels may improve absorption, but they can also add weight. Verify the wall can support them before drilling. Test one sample for a week. It may look excellent online, yet feel fragile, difficult to clean, or too dark in the actual room.