10 Essential Tips for Using Sound Deadening Panels Effectively
In the world of acoustics, sound deadening panels play a crucial role. According to Dr. Emily Harris, an expert in sound engineering, "Using sound deadening panels correctly can transform your space." The impact they have on noise reduction can be profound. However, many people struggle to utilize them effectively.
Understanding the fundamentals of sound deadening is essential. The panels can absorb sound waves, reducing echoes and minimizing distractions. Yet, common mistakes can lead to suboptimal results. An improper installation or the wrong type of panel can mar any benefits you hope to achieve.
It is vital to assess your specific acoustic needs. Consider factors such as room size and intended use. With the right approach, sound deadening panels can enhance your environment in ways you might not have expected. Mastering their use requires attention to detail and a willingness to experiment. Embrace the learning process, as each space is unique and demands a tailored solution.

Understanding Sound Deadening Panels: Material Types and Their Properties
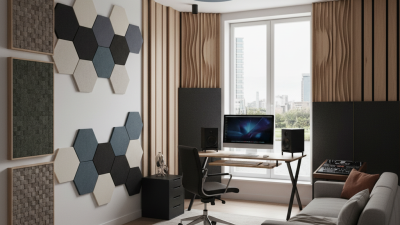
Understanding sound deadening panels is essential for improving your space’s acoustics. Various material types are available, each with unique properties.
Foam panels are lightweight and effective for reducing mid to high frequencies. They absorb sound waves, lessening echoes in a room. On the other hand, mass-loaded vinyl panels are denser and excel in blocking low-frequency noise. Their heavy composition is useful for soundproofing walls and ceilings.
When installing these panels, consider their placement carefully. Covering a larger area may yield better results, but don’t overlook the corners. Corners tend to trap sound, so adding panels in these locations may enhance performance. Ensure proper adhesion to avoid any gaps. Gaps can compromise sound isolation and may create unwanted vibrations.
Experimenting with different types of panels can be insightful. Each type interacts with sound differently. Remember, trial and error are part of the process. Not every solution works for every environment. Be prepared to adjust your setup based on your listening experience. Finding the perfect combination may take time, but the improvement in sound quality is often worth the effort.
Measuring Sound Reduction: Key Metrics and Decibel Levels Explained
When measuring sound reduction, understanding key metrics and decibel levels is crucial. The decibel (dB) scale is a logarithmic measure, meaning small changes can represent significant differences in sound intensity. For example, a reduction from 90 dB to 80 dB indicates a tenfold decrease in sound pressure. In quieter settings, like a library, the ambient sound typically hovers around 40 dB. Achieving sound levels below this can require sharp measures, including sound deadening panels.
A study by the National Institute of Standards and Technology highlights the effectiveness of sound deadening materials. They reported that high-density panels could reduce noise levels by as much as 20 to 30 dB in certain environments. Such reductions improve audio clarity in spaces like home theaters or recording studios. However, keep in mind that placement matters; poorly positioned panels may yield less effective results.
It's also essential to consider the frequency range of the noise you aim to dampen. Low-frequency sounds pose more challenges than higher ones. For instance, a panel may efficiently absorb higher frequencies but struggle with deeper sounds, like bass. This inconsistency can lead to disappointment and requires thoughtful strategies for balance. Many users often overlook their unique acoustical needs, which is a critical oversight when striving for optimal sound environments.
10 Essential Tips for Using Sound Deadening Panels Effectively
| Tip Number |
Tip Description |
Measured Sound Reduction (dB) |
Application Area |
| 1 |
Install on both walls for maximum effect. |
15 dB |
Recording Studios |
| 2 |
Seal edges with acoustic caulk. |
10 dB |
Home Theaters |
| 3 |
Choose the right thickness for your needs. |
20 dB |
Music Rooms |
| 4 |
Use panels in corners for bass traps. |
25 dB |
Sound Studios |
| 5 |
Vary panel placement for balanced sound. |
18 dB |
Podcast Studios |
| 6 |
Ensure proper panel density. |
22 dB |
Voice Over Booths |
| 7 |
Layer materials for enhanced soundproofing. |
30 dB |
Home Offices |
| 8 |
Test with different decibel levels. |
12 dB |
Commercial Spaces |
| 9 |
Consider adding carpeting to absorb sound. |
16 dB |
Living Areas |
| 10 |
Regular maintenance of the panels. |
14 dB |
Commercial Recording |
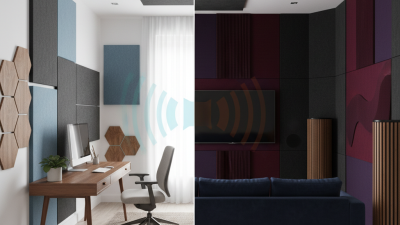
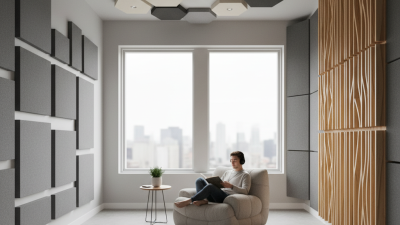
Strategic Placement: Maximizing Effectiveness of Sound Deadening Panels
Strategic placement of sound deadening panels is crucial for maximizing their effectiveness. Identify areas in your space where noise enters or resonates. Typical spots include walls, ceilings, and corners. Without proper placement, panels may not perform optimally. This could leave some areas noisier than others.
Consider the acoustics of your room. Hard surfaces can amplify sound, creating echoes. Place panels on these surfaces to absorb unwanted noise. Positioning panels in a staggered pattern helps to break up sound waves. It’s important to balance aesthetics and functionality, as a cluttered look can hinder overall effectiveness.
Experiment with different configurations. You may find that moving panels just a few inches can yield better results. Take time to listen, adjusting as necessary. Monitor changes in sound quality. This process requires patience and careful observation. Ultimately, strategic placement is about finding the perfect balance for your space, ensuring that every panel counts.
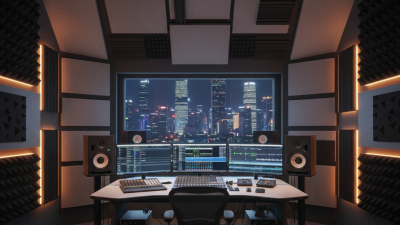
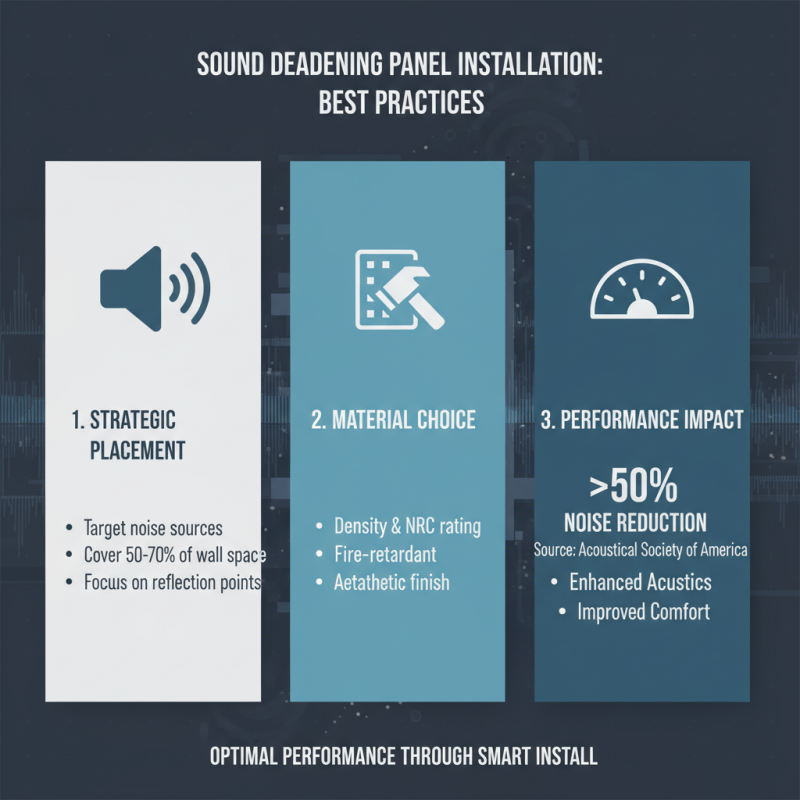
Installation Techniques: Best Practices for Optimal Performance
Sound deadening panels are a critical component for enhancing acoustic environments. Their effectiveness largely depends on correct installation techniques. Proper placement and material choice can significantly impact performance. According to the Acoustical Society of America, installing panels at strategic locations can reduce noise levels by over 50%. This statistic underscores the importance of thoughtful positioning.
Placement accuracy matters. Mounting panels at primary reflection points can amplify sound absorption. Ideally, these panels should be installed at ear level and on walls opposing sound sources. However, individual spaces differ. Evaluating room dimensions before installation allows for tailored arrangements. Penn State's research highlights that improper installation can lead to sound waves bouncing instead of being absorbed.
Using the right adhesive or hardware is also essential for longevity. A secure fit prevents panels from sagging or coming loose over time. Additionally, considering panel thickness can be crucial. Standard thickness usually ranges from one to two inches, but thicker panels can offer greater soundproofing, as supported by research from the National Institute of Building Sciences. Experimenting with different configurations may reveal unique advantages for your space.
Maintenance Tips: Ensuring Longevity and Continued Effectiveness of Panels
Maintaining sound deadening panels is crucial for their long-term effectiveness. Proper care can enhance their performance, ensuring a quieter environment. Regular cleaning is essential. Dust and grime can accumulate over time, diminishing the panels' soundproofing qualities. A study by the Acoustical Society of America highlights that dirty panels can lose up to 30% of their effectiveness. Use a soft brush or vacuum to keep them clean.
Humidity levels in the room also play a key role in panel longevity. Ideal conditions should maintain between 30% and 50% humidity. Too much moisture can lead to mold issues and compromise the material. Conversely, extremely dry air may cause cracks or warping. A humidity meter can help monitor levels effectively.
Inspecting the panels subtly can reveal wear that might not be immediately obvious. Look for peeling, cracks, or any signs of damage. Repairing minor issues promptly can extend the life of the panels. Neglecting maintenance can result in costly replacements. Regular evaluations can offer insights into whether the panels continue to perform as intended.